Pål Andreassen has been kind to permit us to copy this from his Wiki (Norwegian language).
Information from that blog was supplemented by screenshots made by an other kind customer. (Updated 22nd Feb 2025)
You can easily integrate your amsreader into Homey by following this procedure.
¶ MQTT Server / Broker
AMS reader sends data to an MQTT broker. So you will either need an MQTT broker already running in your network, or you can set up Homey Pro as MQTT broker.
I personally run Mosquitto in a docker container on the home server. If you're running Homey without a home server, you can install the app MQTT-Broker on your Homey Pro. It is an advantage if you have set up your Homey with a fixed IP address on your home network. If you don't know how, you must check the instructions for use on your wireless router. If not, the IP address of your Homey will/can change after restarting the router (e.g. in the event of a power cut). To find the IP address of your Homey, open the Homey app on your mobile, go to Settings/General/About. There you will find your current IP address. In the setup of the AMS reader, you must set it to use your MQTT broker. Under Config/MQTT, you set the IP address of your MQTT broker or your Homey Pro. I have deliberately not set up a username/password. Select ams as publish topic.
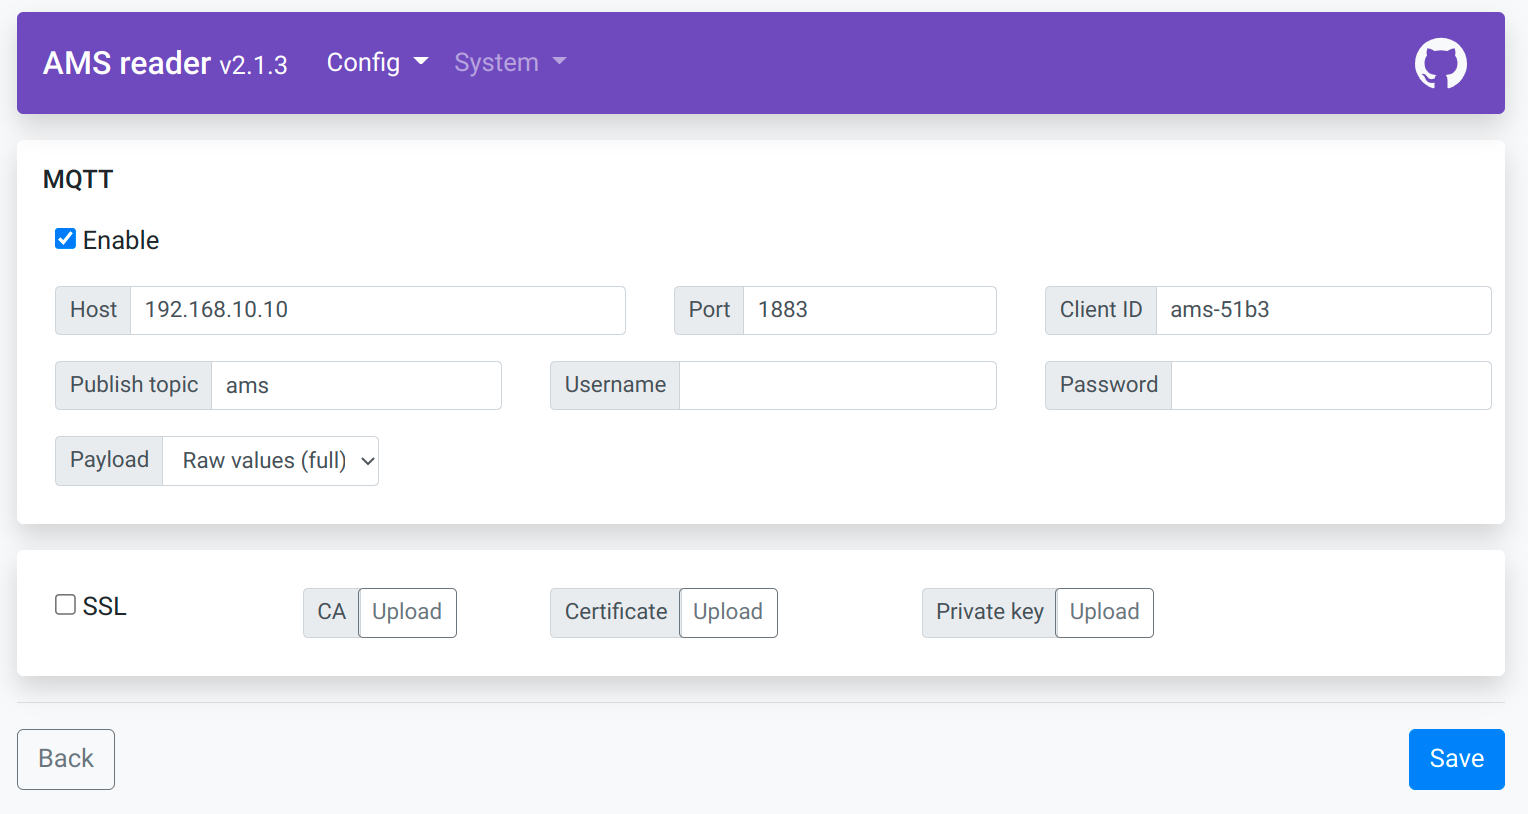
Replace 192.168.10.10 with the IP-address of your MQTT broker / Homey Pro.
¶ Check that it works via MQTT Explorer
MQTT Explorer is a very useful tool when working with MQTT.
Download and install it, then connect to your MQTT broker. You should then be able to see the topic ams with the values from the AMS reader.
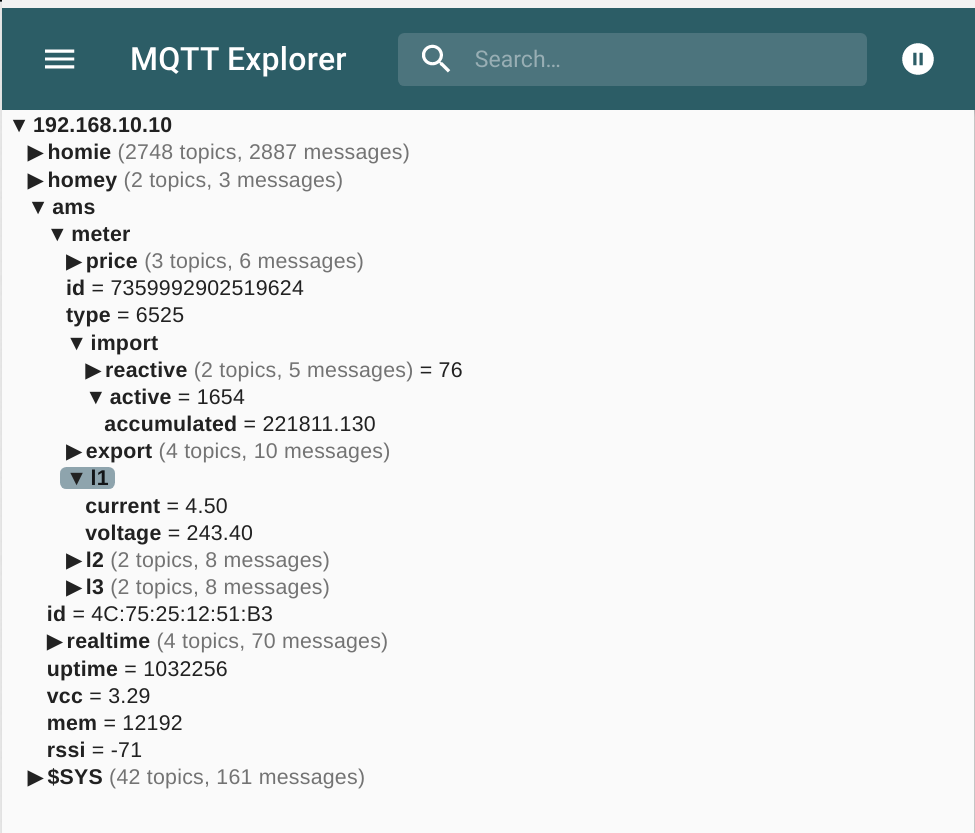
Here you can read /ams/meter/import/active for current value power consumption, /ams/meter/import/i1/current for consumption on phase 1, etc.
¶ Configure AMS as MQTT device in Homey Pro
The next step is to set up an MQTT device on your Homey that retrieves data from MQTT. This is done via two apps on Homey, First we have to install MQTT-Client, which is responsible for the connection to the MQTT server, then MQTT-Hub which allows you to expose existing Homey units via MQTT, as well as create virtual MQTT units.
Install both on your Homey Pro.
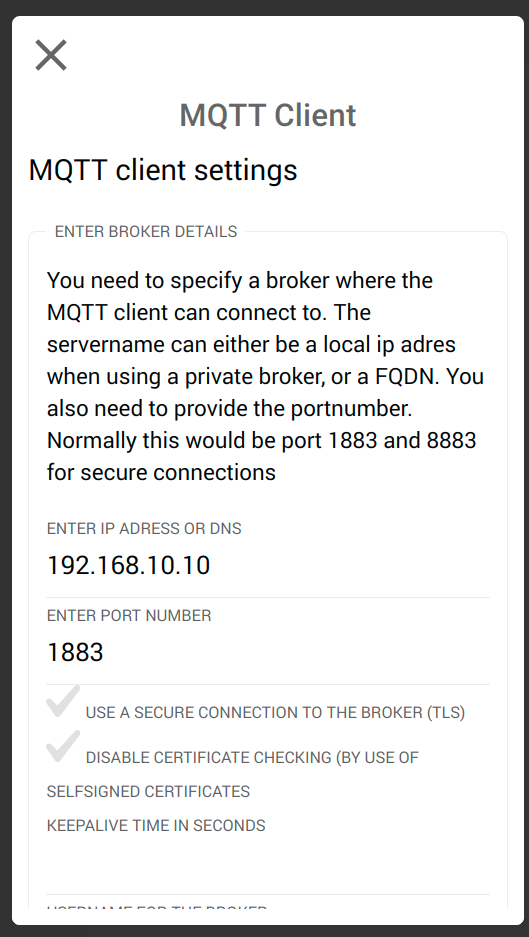
¶ Configure the MQTT Client
Under settings/MQTT Client you must enter the IP address of your MQTT broker / Homey:
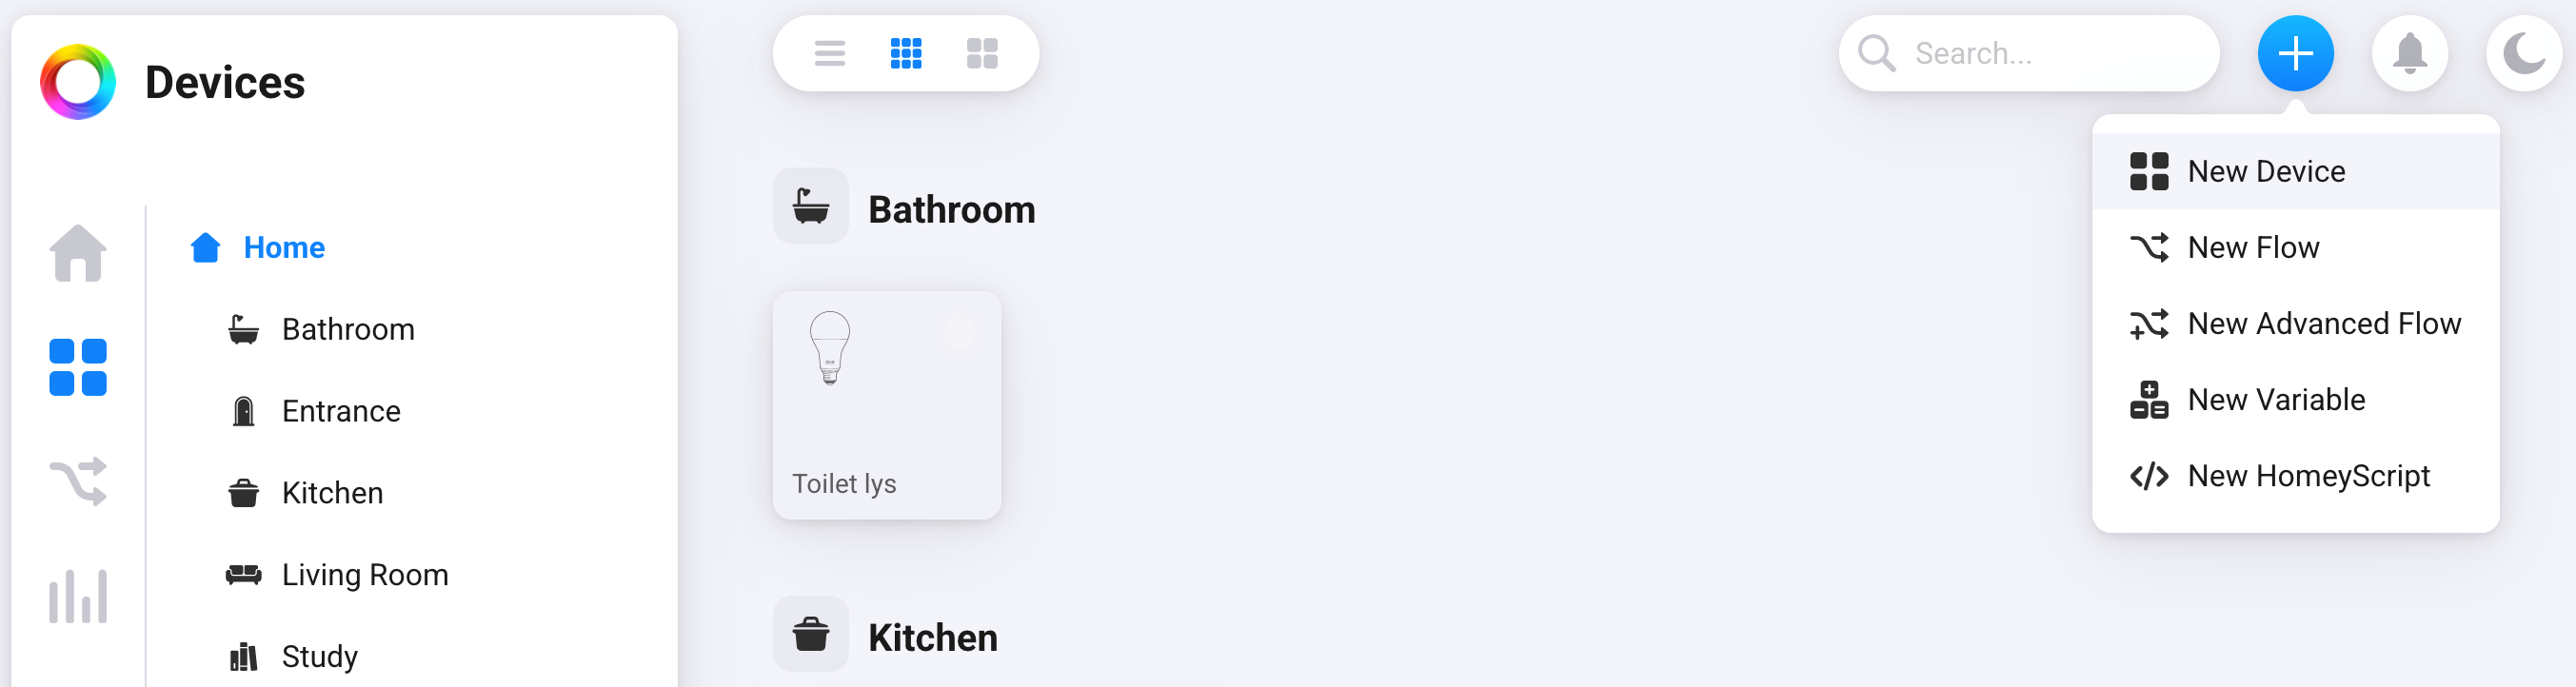
¶ Add new device in MQTT Hub
Go to devices on your Homey and choose New Device:
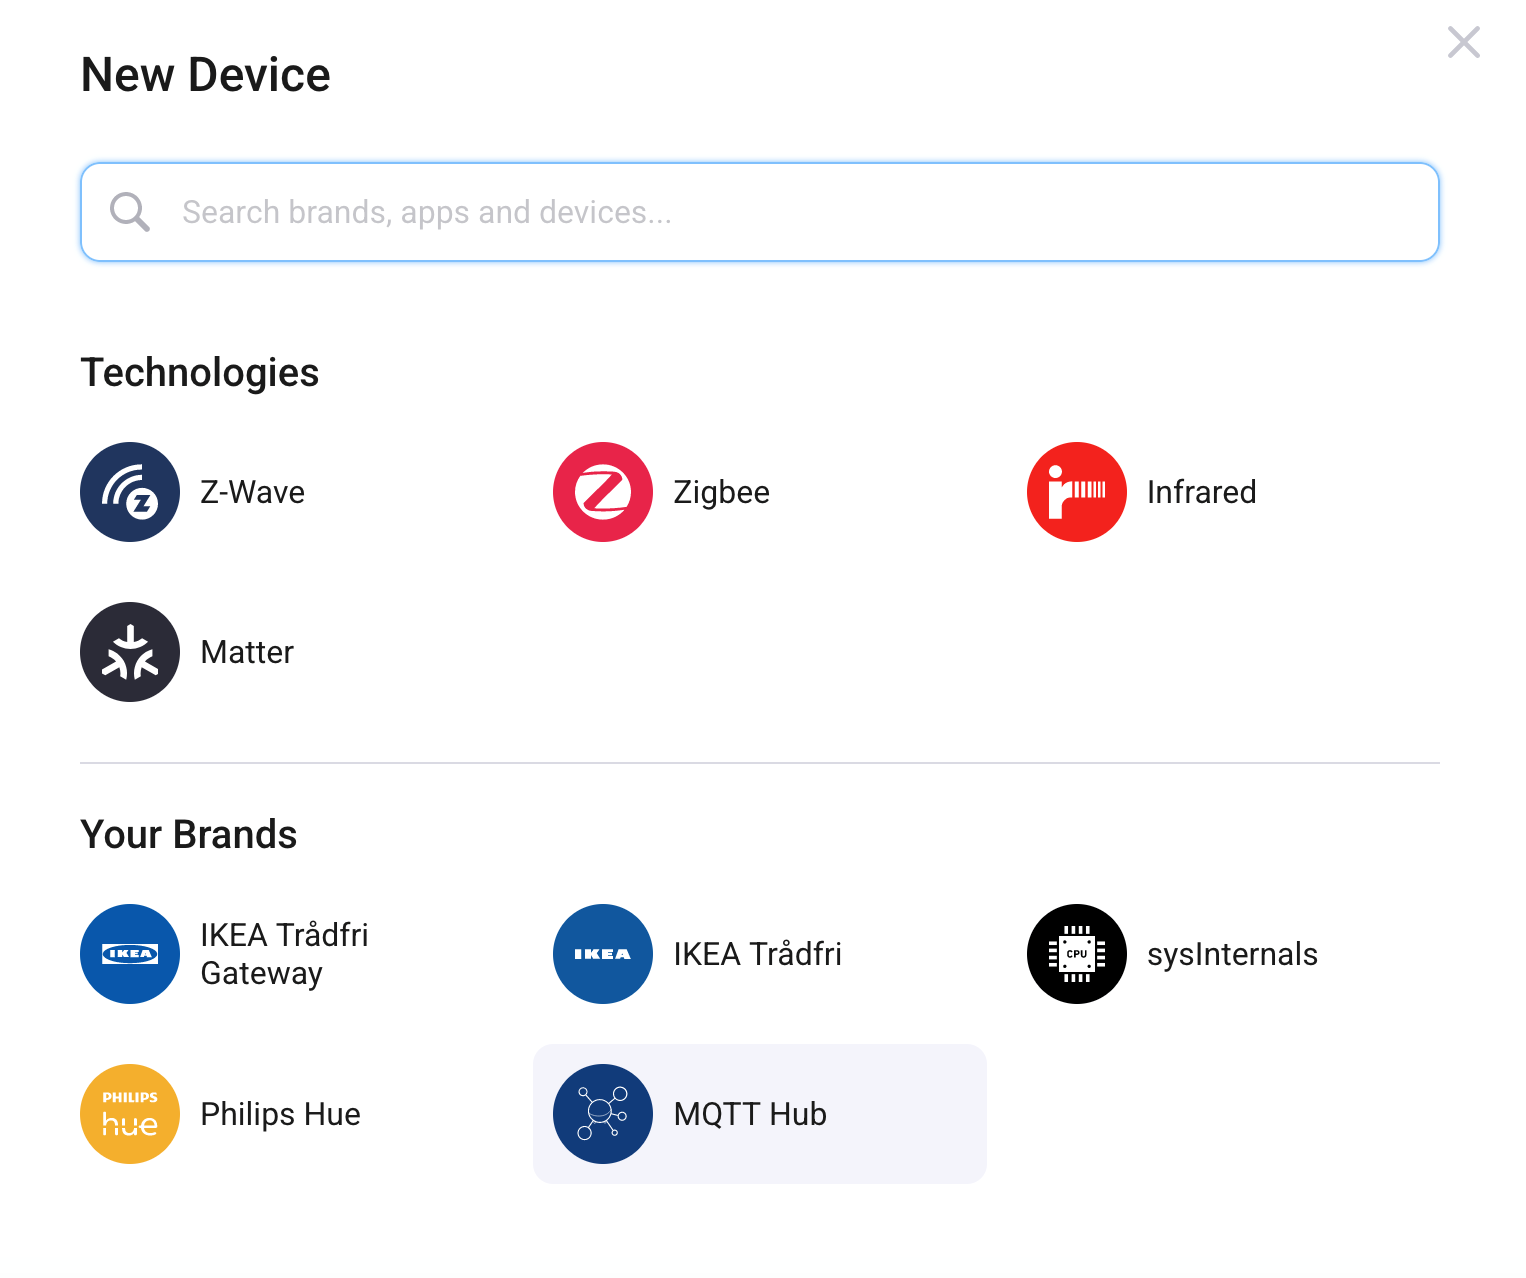
Select MQTT hub:
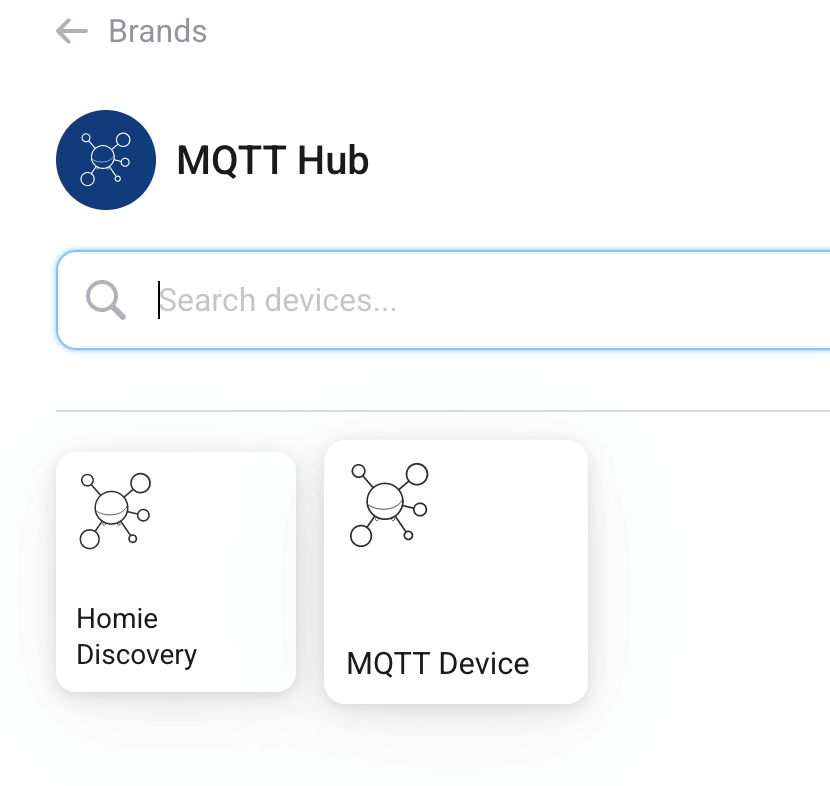
Click MQTT Device:
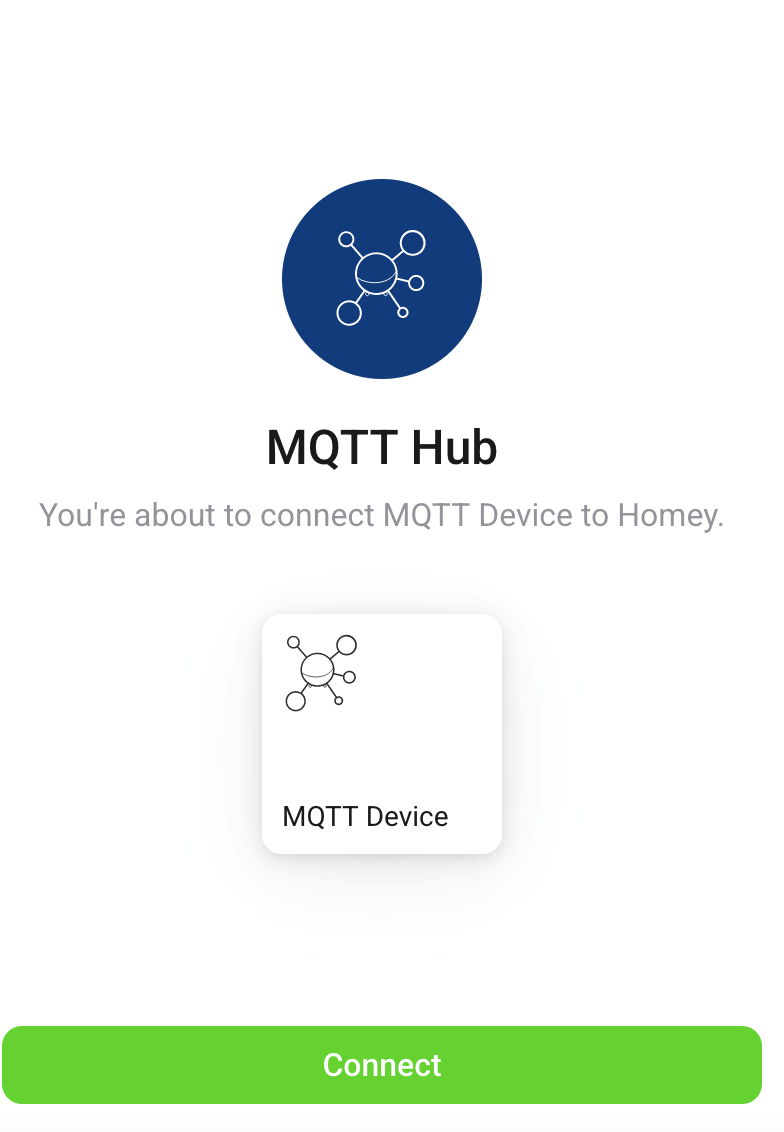
Click Connect:
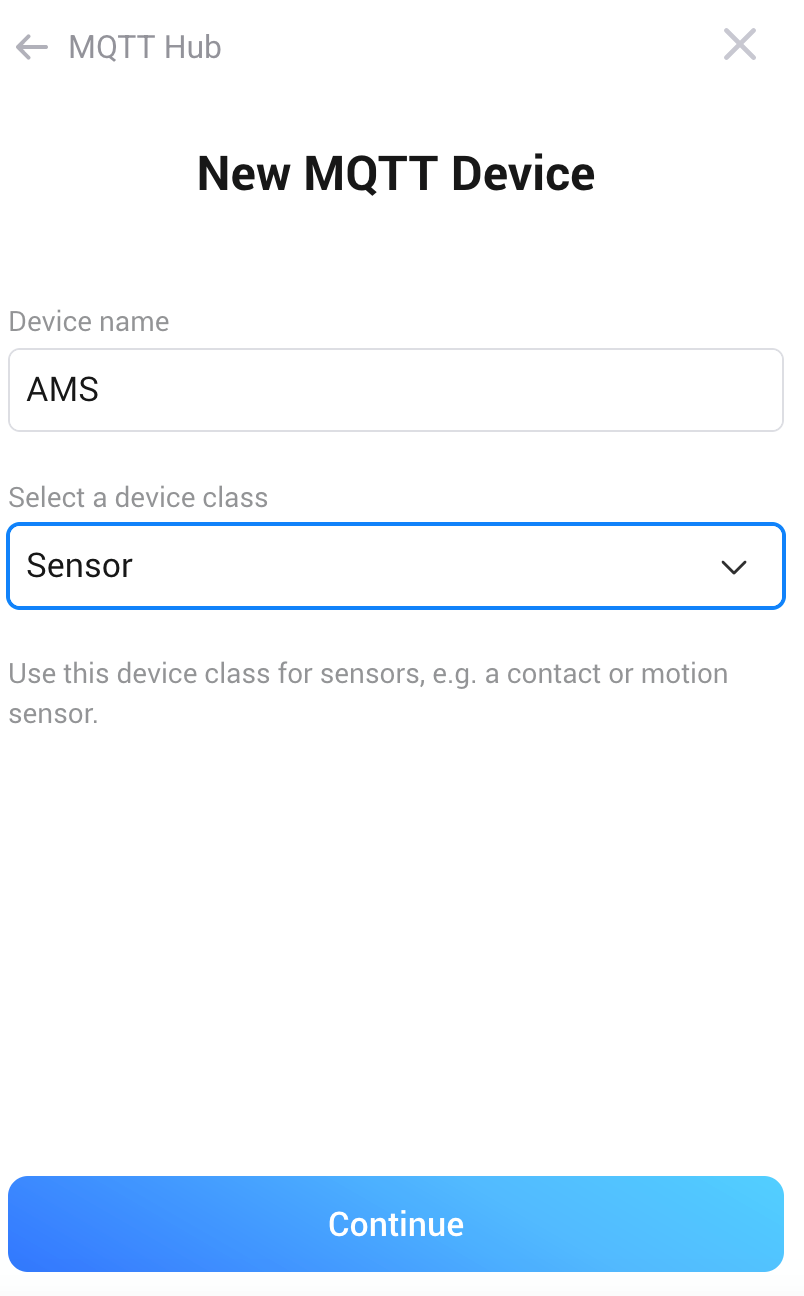
Fill in Device name and select device class Sensor:
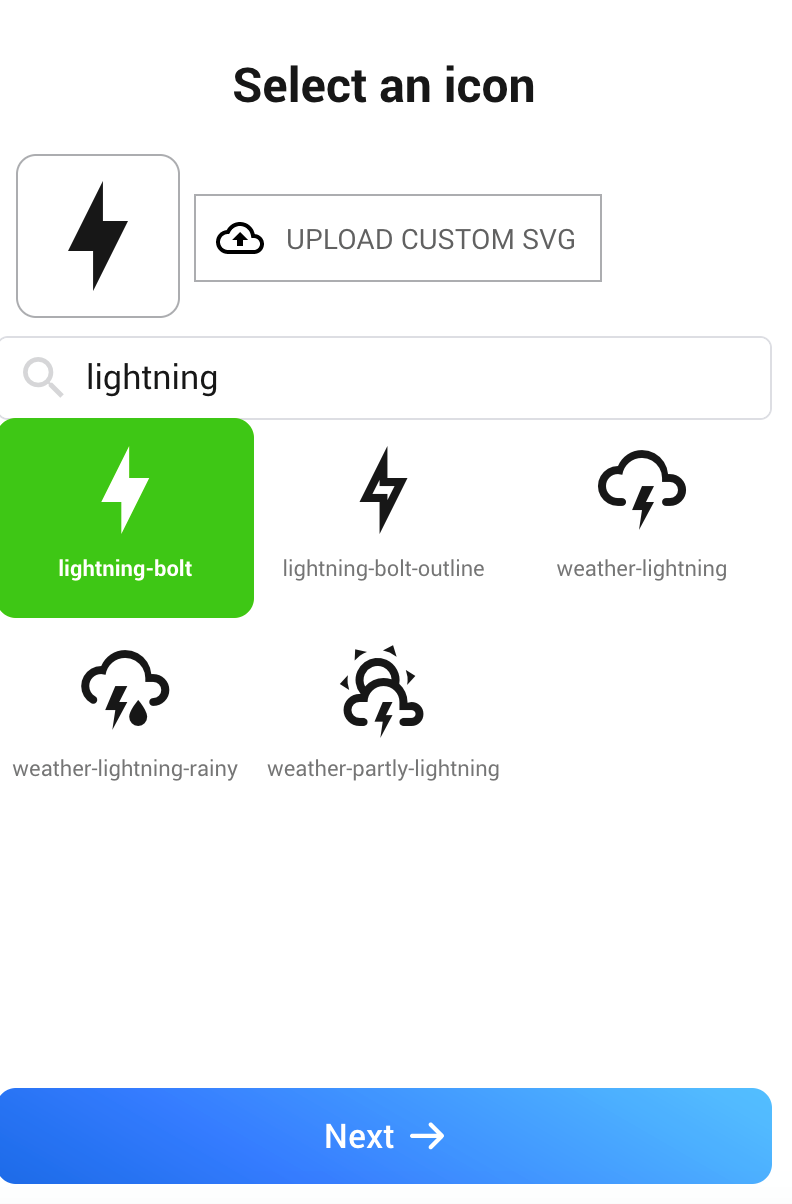
Choose a suitable icon:
Click Next:

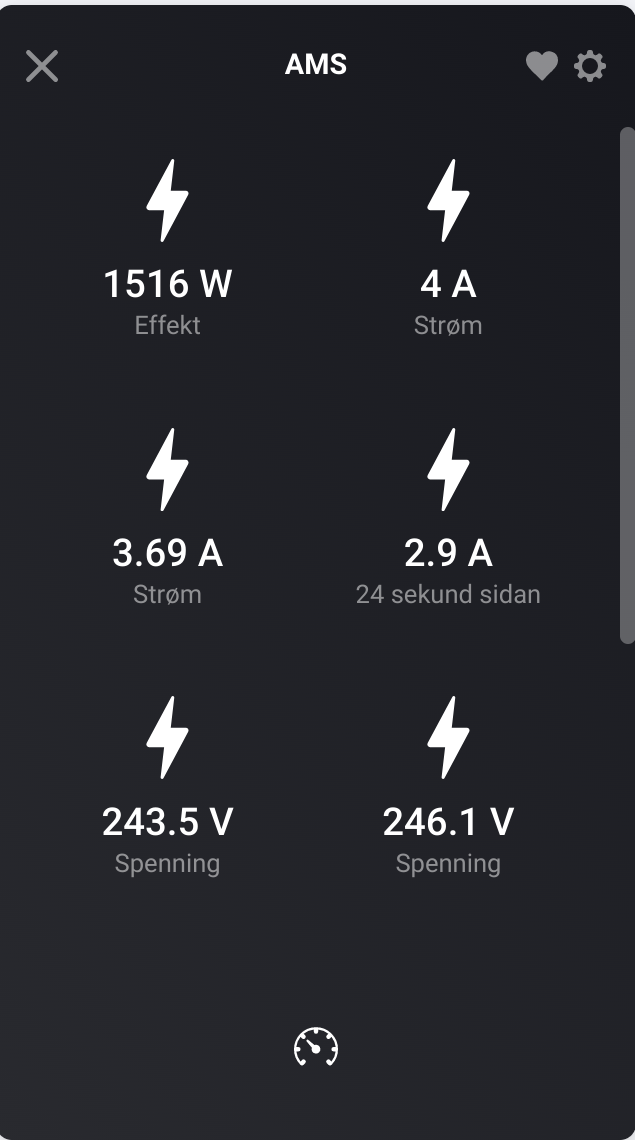
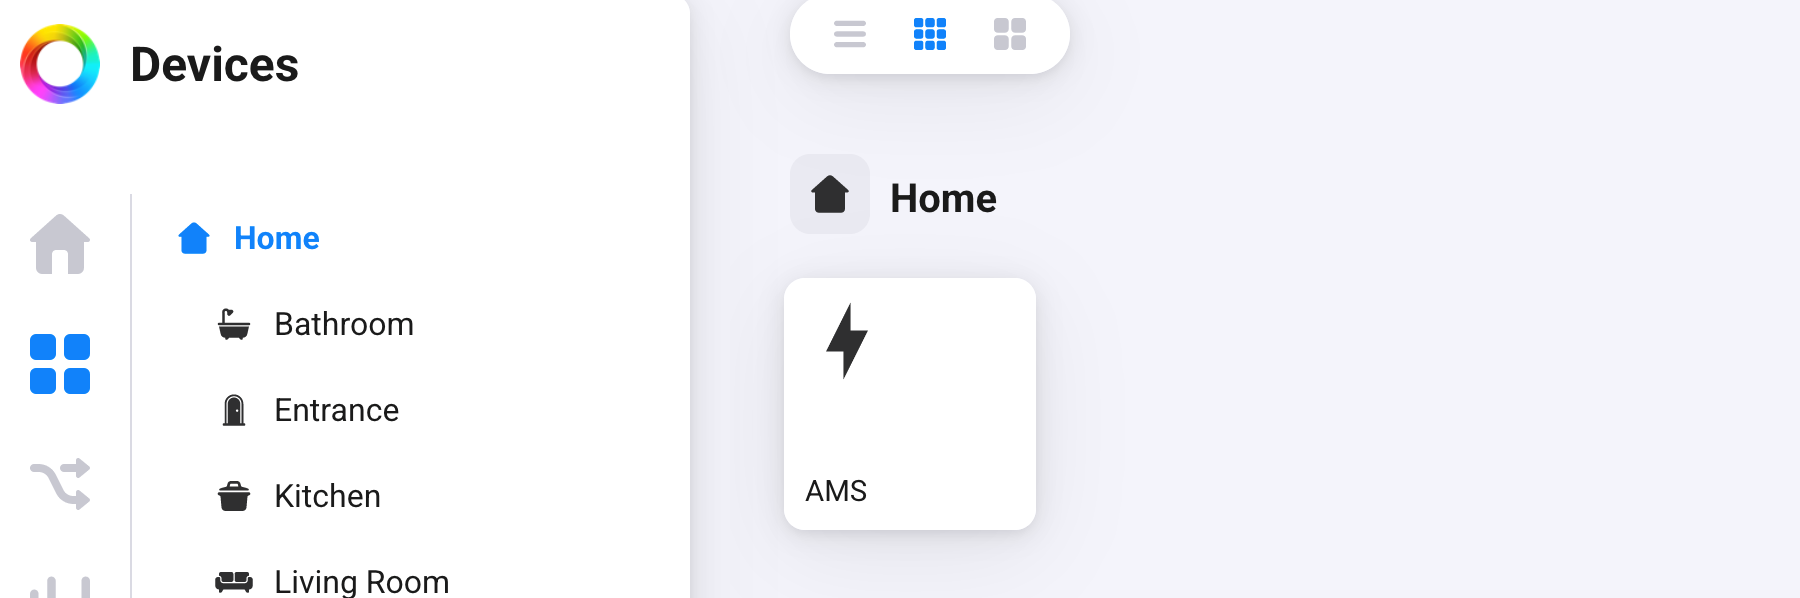
You have now created an MQTT entity called AMS.
Go back to Devices and click the AMS tile:
Click the Gear icon in the top right corner:
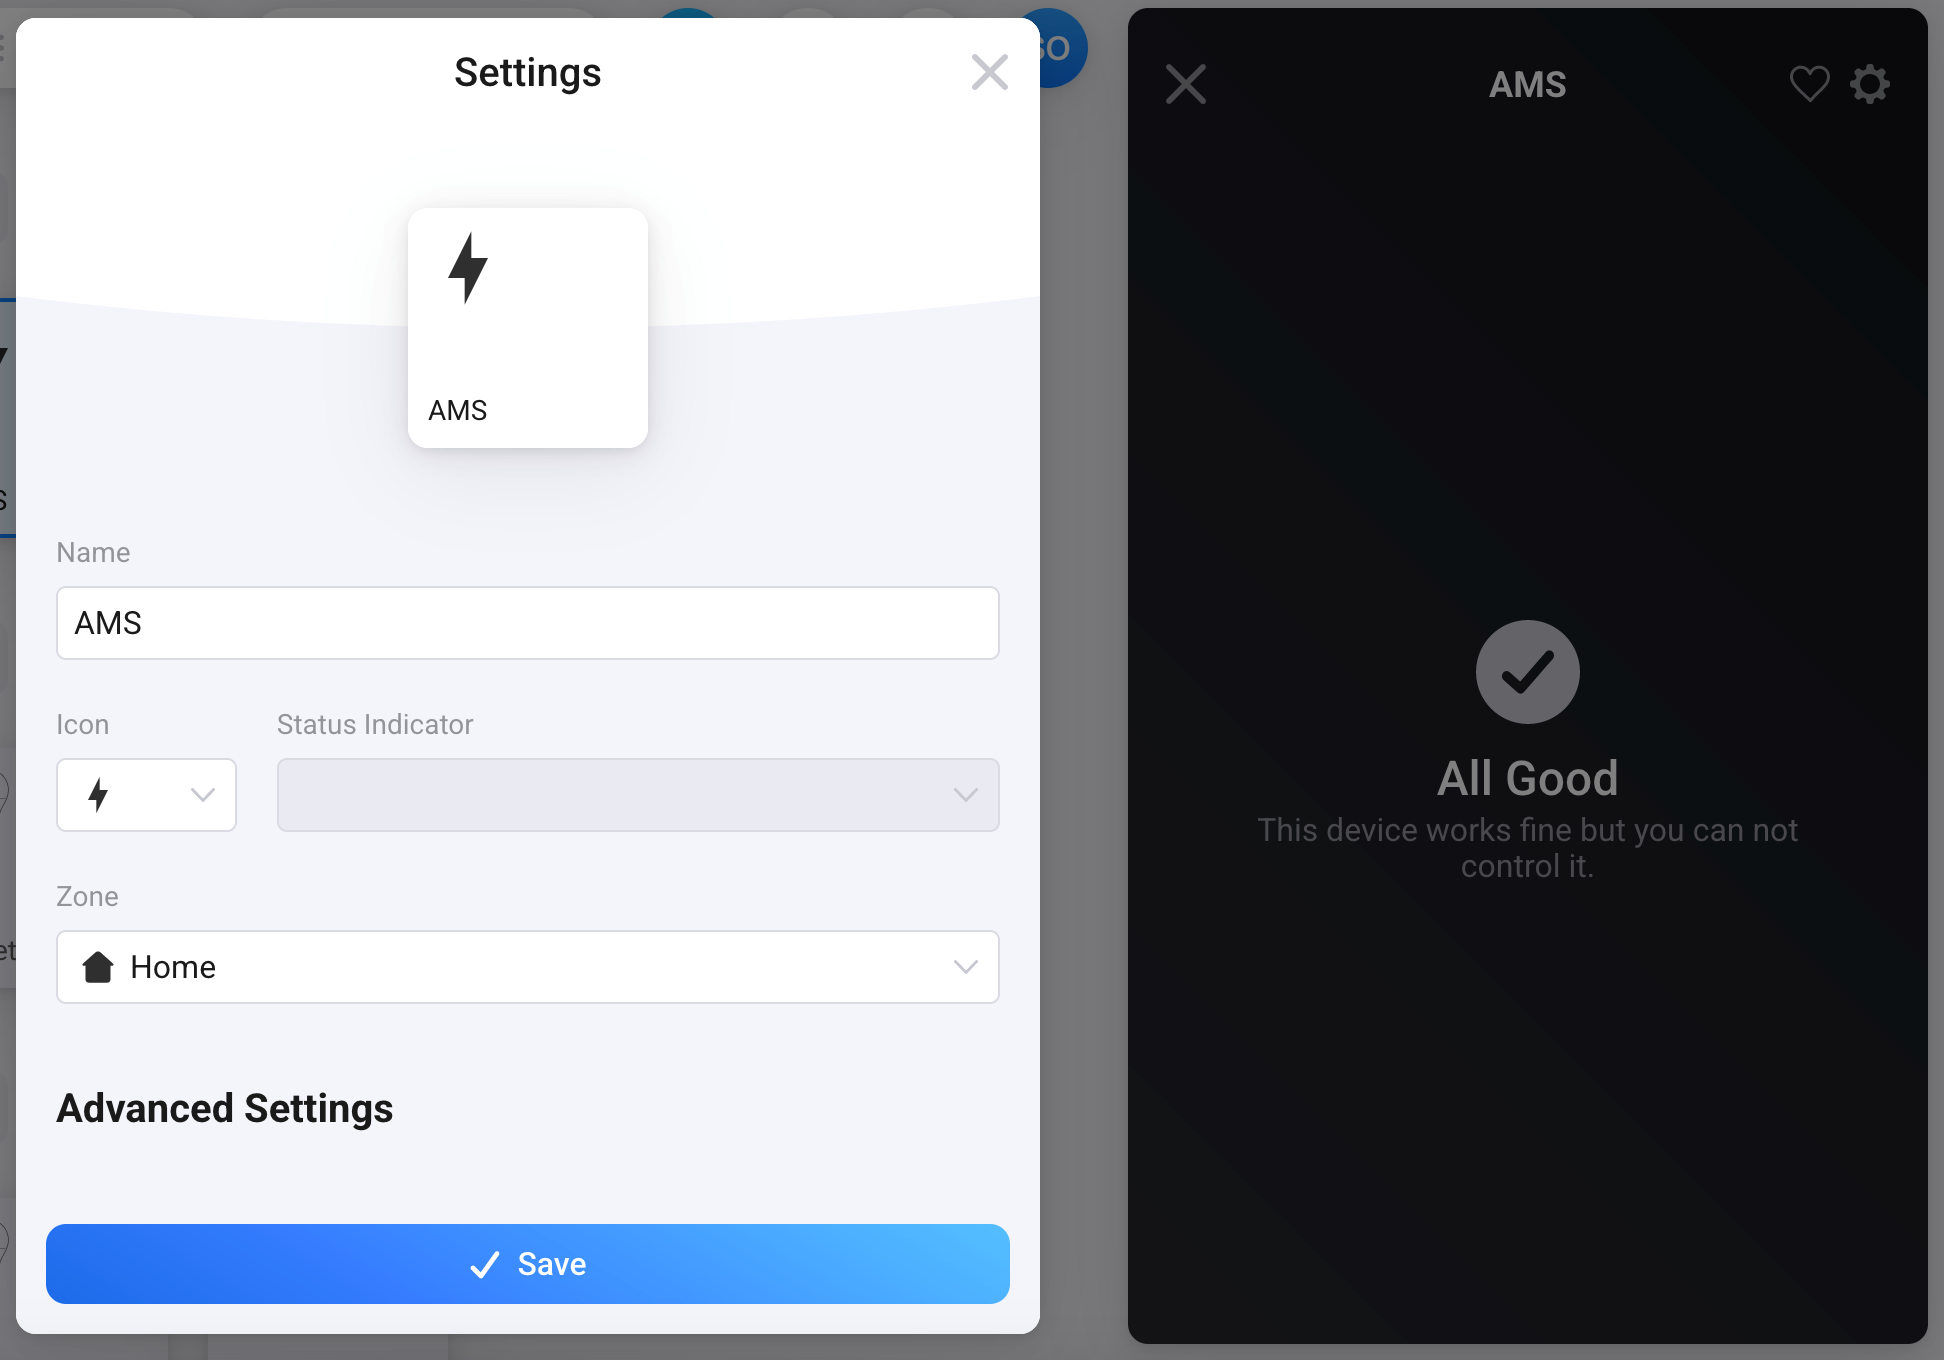
Copy the following code:
{
    "measure_power": {
        "capability": "measure_power",
        "stateTopic": "ams/meter/import/active",
        "setTopic": "",
        "valueTemplate": "",
        "outputTemplate": "",
        "displayName": "Power"
    },
    "measure_current.l1": {
        "capability": "measure_current",
        "stateTopic": "ams/meter/l1/current",
        "setTopic": "",
        "valueTemplate": "",
        "outputTemplate": "",
        "displayName": "Current l1"
    },
    "measure_current.l2": {
        "capability": "measure_current",
        "stateTopic": "ams/meter/l2/current",
        "setTopic": "",
        "valueTemplate": "",
        "outputTemplate": "",
        "displayName": "Current l2"
    },
    "measure_current.l3": {
        "capability": "measure_current",
        "stateTopic": "ams/meter/l3/current",
        "setTopic": "",
        "valueTemplate": "",
        "outputTemplate": "",
        "displayName": "Current l3"
    },
    "measure_voltage.l1": {
        "capability": "measure_voltage",
        "stateTopic": "ams/meter/l1/voltage",
        "setTopic": "",
        "valueTemplate": "",
        "outputTemplate": "",
        "displayName": "Voltage l1"
    },
    "measure_voltage.l2": {
        "capability": "measure_voltage",
        "stateTopic": "ams/meter/l2/voltage",
        "setTopic": "",
        "valueTemplate": "",
        "outputTemplate": "",
        "displayName": "Voltage l2"
    },
    "measure_voltage.l3": {
        "capability": "measure_voltage",
        "stateTopic": "ams/meter/l3/voltage",
        "setTopic": "",
        "valueTemplate": "",
        "outputTemplate": "",
        "displayName": "Voltage l3"
    },
    "meter_power.acc": {
        "capability": "meter_power",
        "stateTopic": "ams/meter/import/active/accumulated",
        "setTopic": "",
        "valueTemplate": "",
        "outputTemplate": "",
        "displayName": "Energy"
    },
    "meter_power.hour": {
        "capability": "meter_power",
        "stateTopic": "ams/realtime/import/hour",
        "setTopic": "",
        "valueTemplate": "",
        "outputTemplate": "",
        "displayName": "Energy this hour"
    },
    "meter_power.day": {
        "capability": "meter_power",
        "stateTopic": "ams/realtime/import/day",
        "setTopic": "",
        "valueTemplate": "",
        "outputTemplate": "",
        "displayName": "Energy this day"
    }
}Paste the code into the Advanced field:
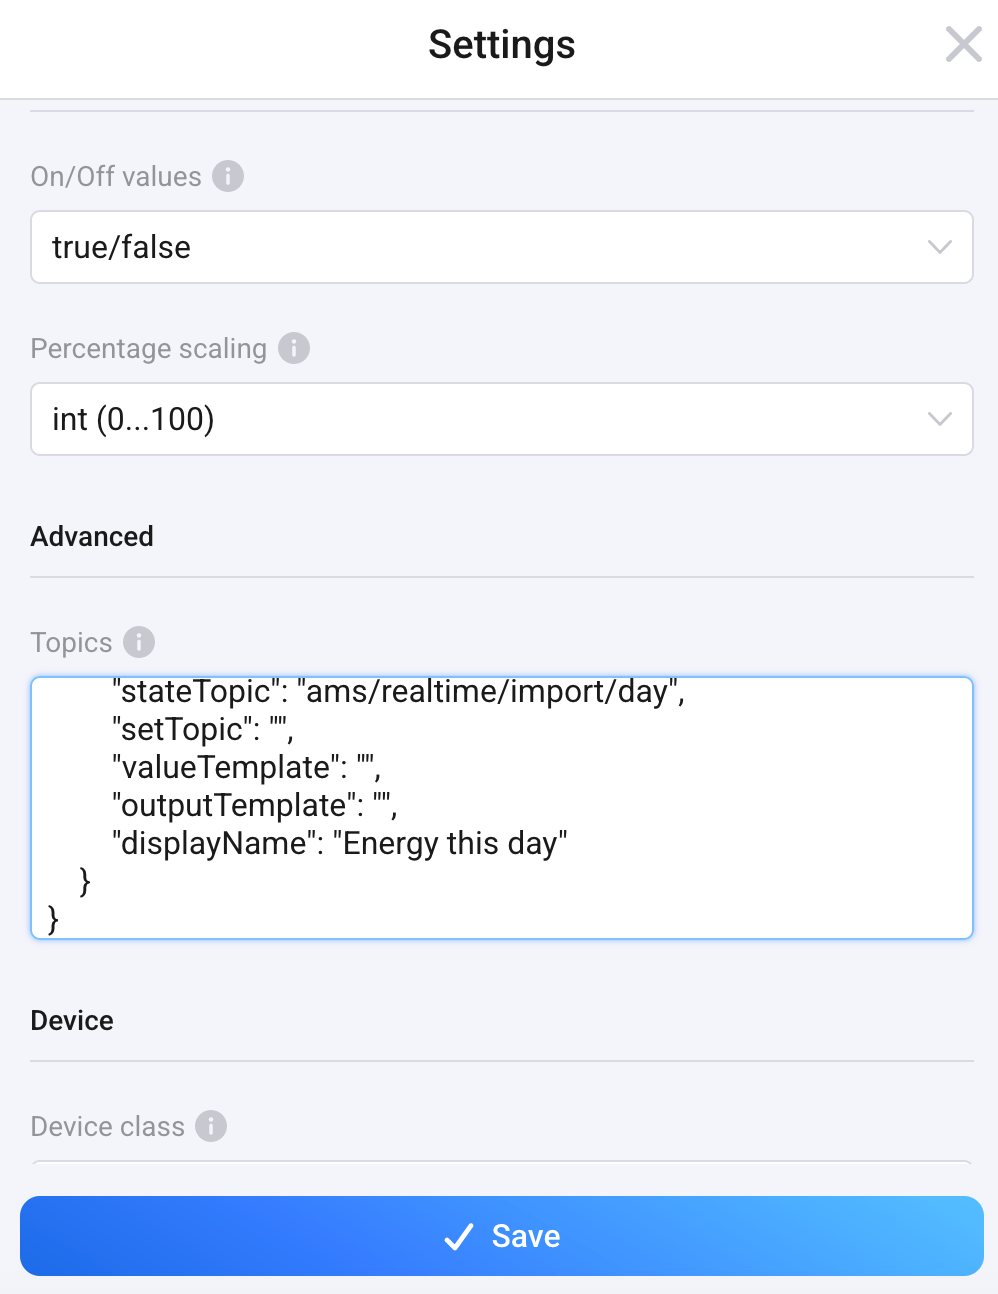
Click Save.
Your device should now retrieve properties from the AMS reader: